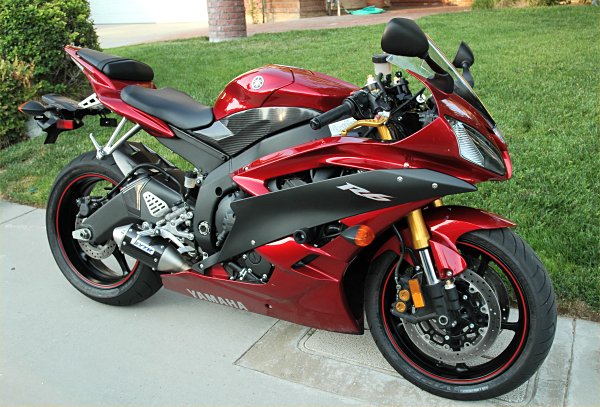
This is a really fun bike to ride. It provides a visceral, and vivid experience every time I ride it — its intake resonance and banshee wail of the engine filling my auditory senses while I slice-and-dice my favorite roads with the scalpel-like chassis.
With the exception of adding two clicks of rebound damping to the shock, the excellent suspension has remained untouched by MD staffers since initial tweaks were administered shortly after delivery. Rarely do we all agree on a single suspension setup, but this time, we have. Almost invariably, one of us wants a little more preload, or a little less compression damping, etc., but this suspension has proven to be a true ‘one size fits all’, which means more riding time, less roadside fiddling.
This has also been a rather frustrating bike to ride. Eh?, what? “Do tell”, you say. And so I will. It’s not a CIA Top Secret issue, this powerband bestowed upon (burdening?) the R6 engine. Racy, with the all the good stuff waiting on the north side of the 10000 rpm mark, the engine’s high rpm allure is largely wasted on the street, and even on the track, it’s harder work to keep on the boil than its classmates. On a daily basis, leaving stoplights can be challenging. Brisk launches at less than 5000 rpm will likely have you fanning the clutch, 125cc dirt bike style.
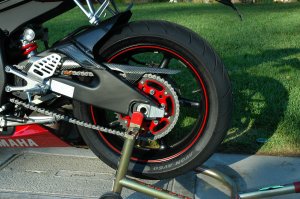
There just isn’t the low rpm oomph needed for the daily commute, and riding the bike in these conditions then becomes work, and that’s not why we ride. What to do? Give the engine more leverage, of course. Time for a gearing change. Initially, we decided on a one-tooth (15 vs. 16) drop at the countershaft and adding two teeth to the rear (47 vs. 45), but after running the numbers through an excel spreadsheet to see resulting rpm / road speed figures, we decided to keep the countershaft sprocket as standard and just go bigger at the back sprocket by two teeth.
This is more expensive, since countershaft sprockets are relatively cheap, but a smaller diameter front sprocket works the chain harder (read shorter chain life), and on some bikes can actually cause accelerated wear on the top run of the chain running against the rub guards on the swingarm pivot, prematurely wearing them out with the increased contact with the chain.
While we were altering gearing, we took advantage of the opportunity to reduce weight by going for a 520 conversion. Since the OE setup is a 525, weight was indeed reduced, but only by a few ounces. Still, you take it where you can get it. The parts came courtesy of McCoy Motorsports, specialists in Yamaha R6 and R1 mods. The chain is an RK 520XSO RX-ring chain with a clip-type master link. RTV sealant on the master link gives you much better odds of retaining the master link clip. Countershaft duties were filled by a 520 by 16 tooth. Out back, a Stealth rear sprocket in the 47 tooth model, color coordinated to the R6’s beautiful deep-red paint and red wheel stripes.
The Stealth sprocket is made from a steel outer toothed ring, mated to an aluminum carrier using forged aluminum rivets. Claims are greater life versus an aluminum sprocket, due to the steel outer ring, and lighter than a steel sprocket because of the aluminum center. It is lighter than the OE steel sprocket and adds a bit of bling with its red aluminum center. We would like to put their mileage and durability claims to the test, but sadly, we’ll not have the R6 that long, so “your mileage may vary.”
What we can attest to is that launching the R6 from a stop now is a much less taxing affair of clutch / throttle coordination, and the added buzz at freeway speeds is minimal. In retrospect, perhaps a three tooth increase out back would have been ideal. We did not add a speedometer correction unit after the gearing change, so be forewarned that if you do what we did, spend the extra $80 or so and get one so you can know what your actual speed is and have an accurate odometer reading as well.
If you read part one of our long term report, you’d know about all the carbon fiber bits we added and the GYT-R slip-on muffler. We weren’t finished. We also received the carbon fiber chain guard and GYT-R frame sliders. While the rear wheel was out for the gearing change, we installed the chain guard, which was a straightforward process.

Next up were the frame sliders. These are the “no-cut” variety, meaning that cutting holes in the bodywork would not be necessary. The supplied instructions and hardware made the install process very easy. Removal of the ‘barge boards’ is necessary to access the frame mounts the sliders utilize, and is quick and easy. Extra length frame mount bolts and washers are provided to substitute the original bolts. The right side slider must have its flat side profile oriented to provide clearance for the barge board. After the bolts are torqued, put it all back together and rest with the piece of mind that the frame sliders will be there to take the brunt of a low speed tip over while minimizing the impact to the bike, and your wallet.
What else? Hmmmmm….. We did complain about the brakes – wooden feel, high lever pressure, etc. No, no new brake pads this time. We felt that something was amiss and out came the wrenches again to remove the pads for a little face-to-face meeting with a circular sanding disk to rough up the surface a bit while removing any glazing. About 20 or so miles later, the brakes were transformed! No longer did you need a bodybuilder’s grip to extract short stopping distances, and feel that was missing had been restored. These are the brakes Yamaha shipped this bike with! Now, about those low handlebars…….

